
If you are creating an event but have not yet created your group, click here. For those who have an existing group, log in and navigate to your group dashboard.
Note: Users can only create events when logged in on a computer browser or phone browser. Event creation is not currently supported on the GivePulse mobile app.
This article will review different phases and details about Event Creation:
- Basic Information
- Event Privacy
- Multiple Event Type: Details and Adding Shifts
- Event With Shifts
- Registration Settings
- Registration Questions
- Impact Settings
- Impact Form and Questions
- Event Settings
- Additional settings to consider
- Check out the video below for more info on this topic!
- Event Images
On the group dashboard, click on "Events" on the left-hand menu and then select "Add Event" Selecting this will guide you through a process to fill out the required fields.
Basic required information for your event:
-
Name: A short, clear, and identifiable name for the event
Description: Don't copy and paste from something else. If you have the opportunity to modify the content and make it short, concise, and enticing, this will drive more interest. - Admin: An Event Admin will manage, organize, edit, and receive notifications about the event. You can select members and existing admins in your group.
-
Cover Image: Additional features include selecting from our image library or uploading your own. If you choose to upload your own cover image, the minimum image dimensions are at least 908x318 pixels.
Images in the event cover image library can be downloaded and archived. Archiving an image means you lose access to that image forever.
Pro Tip: Before archiving an image, be sure to download it in case you need it in the future.
-
Event Type:
- Define your event type.
-
- Volunteer - an event type where volunteers, someone contributes their time, skills and experience to an organization. Note: By default the "impact settings" are turned on so hours are being collected and tracked. Normally the usage for volunteer opportunities to allow for foundational metrics to be captured.
- Event - an event type where volunteers can contribute money, goods, training, research, voting, or anything other than time(hours). Note: by default the "impact settings" are turned off so hours are NOT being collected. Normally the usage for events is to "track" the following: attendance, signups, RSVPs, etc.
- Project - an event type that involves completing milestones.
- Pledge - an event type where a user pledges to complete (running a marathon/miles)
- Ticketed - an event type where an admin can set tickets to be purchased.
- Fundraiser - an event type where an organization can raise funds
-
Donation Drive - a crowdfunding campaign to receive donations from your community of supporters and volunteers.
-
- Define your event type.
-
Frequency: Define your event frequency (how often?)
- Single/One-Time - one-day event with a start and end time in one day.
- Multiple Dates/Shifts - for specific dates, you can create shifts, specific dates and/or time frames/slots/shifts
- Ongoing/Open - if there are no defined times, this is for general events (think monthly or annually)
-
Privacy Settings: If you have a free basic-level subscription, your event will automatically default to Public. You can follow this link to read more about Event Privacy Defined.
- Note: various levels of event privacy are offered to our Give Joy, Give Together, and Give More linked here: subscription levels.
- Visibility: If you've chosen a privacy setting for your event, you have the option to make it visible to non-members from the search or explore pages, as well as to display it on the group page.
After completing page 1: Basic Info, you will save and continue to move forward to page 2: Details.
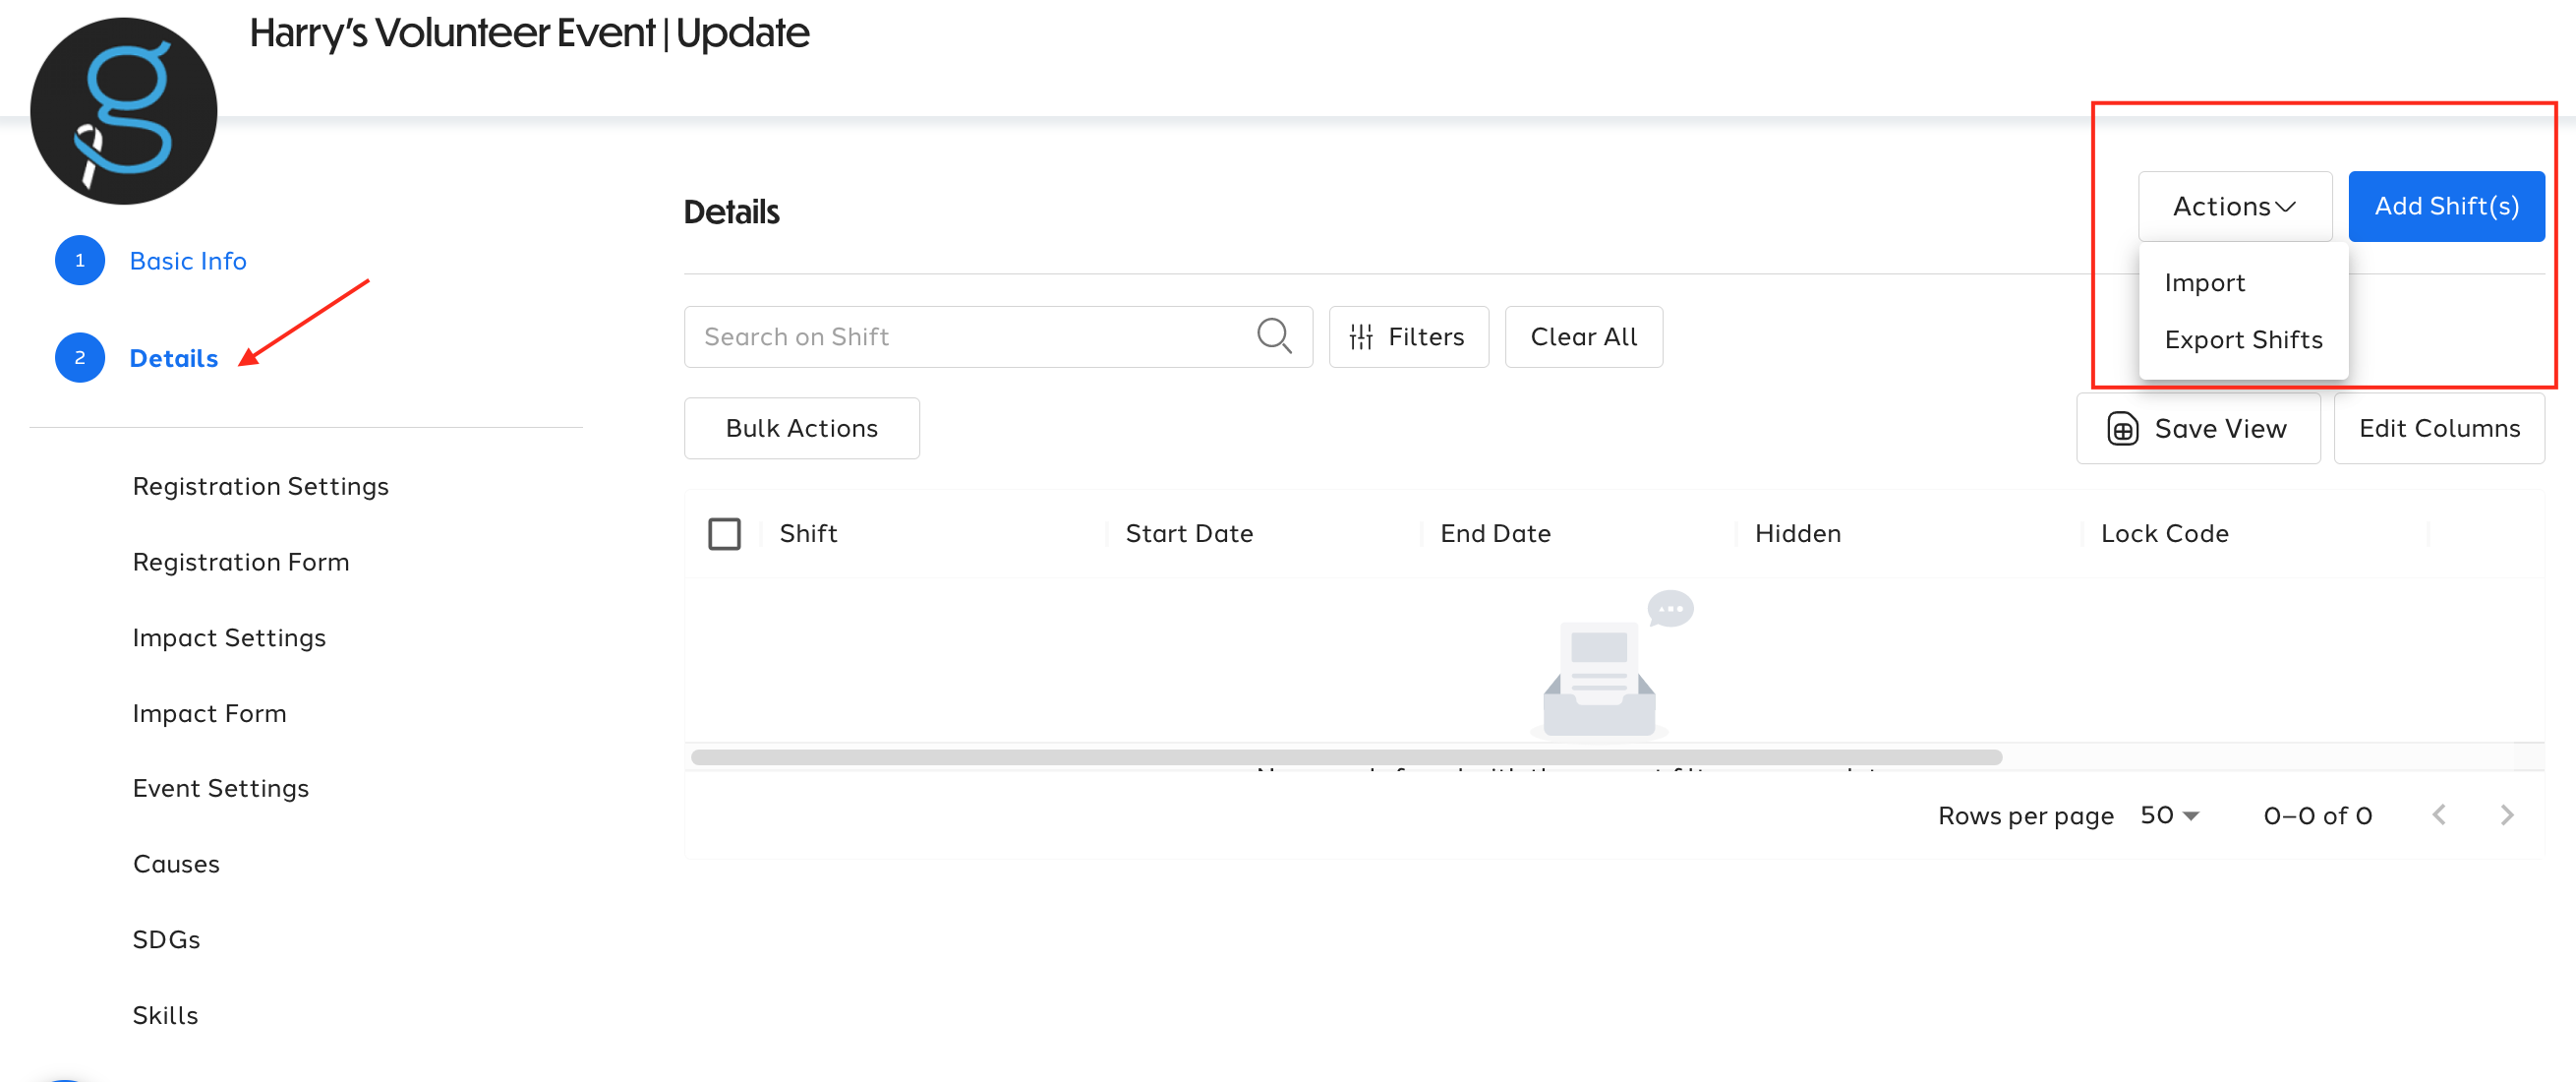
Multiple Event Type: Details and Adding Shifts:
Event With Shifts:
You can add shifts to an event by selecting multiple dates/shifts event-type. You can click the Blue Add Shift(s) button in the top right and you can import or export shifts by clicking the 'Actions' drop menu.
Import shifts are currently only supported in Classic View. You can learn more: Managing and Editing Shifts
When adding a shift you can add shift title or name, shift description, participants needed, date & time, if the shift repeats (on a certain day for a certain time, weekly, monthly, or other), address start and end, and other settings for the shift specifically.
Details:
- Start/End Date & Time: Set what date and time the event opens and closes
- Participants Needed: the number of people you believe will be needed. If you have an unlimited number, set it as "-1."
-
Is this a virtual or remote opportunity? Indicate whether the opportunity is virtual.
- If you select yes, you will be prompted to add a conferencing link.
- If you select no, you will be prompted to include an address and optional address notes.
Registration Settings:
Through the registration settings tab, you can change and set the time period users can register, set a registration open and/or close date, how close to the event users can cancel their registration, and more.
Registration Questions:
You can set custom questions that users have to answer to register for each event. Here, we recommend using 'Add Existing Saved Fields', you can learn more about custom fields
Impact Settings:
Through this tab, you can adjust general impact settings: when to allow impacts, who can create impacts, when reminder notifications to create an impact are sent, impact types, mobile settings (including clock in/clock out), and more.
Impact Form and Questions:
You can create custom impact questions to request information from your volunteers or users who attended or participated in the event. Here, we recommend using 'Add Existing Saved Fields', you can learn more about custom fields
Event Settings:
Through the event settings tab, you can change additional facets of the event. On the General tab, you select age limit, requirements (background check, training, or other), and parking details.
Note: If your event includes "Shifts or Timeslots", there will be additional optional settings fields for you to complete.
On the Appearance tab, you can customize the Discussion Wall, Map, GivePulse Event Stats, Participants, and Positions Remaining.
On the Notifications tab, if you add multiple admins to an event, you can opt to send notifications to the primary event admin or all admins in the event.
View or Publish
At any time during the Event creation workflow, you can select the top button 'View' and preview the event, this is how your event will look as a volunteer, visitor, or non-admin user.
When you are finished and happy with your event, you can either click "Save," which will place the event in draft mode until you are ready to publish, or "Publish" if the event is ready to have people register.
Additional settings to consider:
Causes, SDGS, and Skills
- What causes does this event support?
Sustainable Development Goals
- If certain skills are required or desired, let people know by selecting them here. This helps users find your opportunity when searching for ways to help.
Registration Settings - Group Registration: This feature will not be available in New View. Here you can learn more about Wait List, Minors Signups, Group and Guest Registration Settings
Registration Questions - Collecting Data: If you wanted to collect specific data about your registrants before they attend the event, you can select the default fields provided or create your own custom fields. Default fields are listed at the bottom of this article linked here: about custom fields. Some examples for additional information you may want to request are: "How did you find out about this event?", "What do you know about at-risk children?" etc.,
Registration Settings - Registration Approval: If you want to approve each individual when they register, this will allow you to control who is able to register.
Check out the video below for more info on this topic!
New View
If you have any questions, please reach out to support@givepulse.com.
Comments
0 comments
Article is closed for comments.